Tips for conducting a DIY home inspection

Most property owners don't bother to schedule home inspections until serious problems arise. Of course, this is an expensive strategy, as major, precipitous problems can end up costing thousands to repair. With this in mind, consider performing your own do-it-yourself inspections from time to time. Just review these strategies before you start digging around in your crawl space:

Get prepared
To perform a proper inspection, you're going to need some gear. Gather a pair of gloves, a flashlight and flathead and Phillips-head screwdrivers for probing, Popular Mechanics advised. If you're planning to inspect an area you believe to be structurally unsound, get yourself some head protection as well.

Once you've assembled your equipment, formulate an inspection plan. Evaluate the exterior and interior of your home, focusing on essential architectural features such as the foundation and roof. Additionally, be sure to collect important information about your property, the American Home Inspectors Directory suggested. You need details, such as its date of construction, to contextualize what you ultimately find.

"Evaluate the exterior and interior of your home, focusing on key architectural features."

Review the exterior
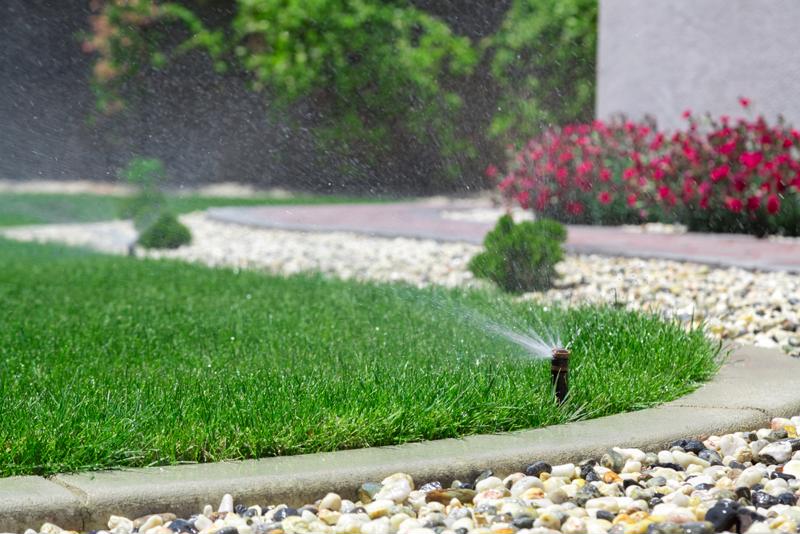
Begin your DIY inspection by reviewing your home's exterior features. First, check key problem areas that could immediately impact curb appeal, the National Association of Realtors recommended. For instance, ensure that your drainage system is working properly and preventing pools of moisture from collecting in the yard or beneath paved areas. Additionally, inspect your walls for cracks or other imperfections. You might also consider checking your windows to see if they're properly sealed and energy efficient.

Review the interior
Next, move inside. Most home inspectors start with the basement, so follow their lead and do the same. While you're down below, check the walls for leaks and look for cracks in the foundation. Then, scan the ceiling above to assess the condition of the exposed joists. Move up and through the rest of your home, focusing on rooms with major electrical or plumbing features.

Call a professional
If you uncover something outwardly fishy during your DIY inspection, call a professional home inspection company and schedule time with a certified inspector. These individuals can look over the areas of concern and complete more in-depth tasks, such as reviewing complicated electrical features, searching for mold and performing radon testing.

Staging strategies: Kitchens [Video]

Hello again! Welcome to the third installment of Staging Strategies. Today, we’re talking staging tips for the kitchen.

Most house hunters focus on cabinets as they tour the kitchen. If you’re working with immaculate cabinetry, this is great. However, chances are your cabinets are thoroughly worn after years of use. Luckily, there’s a simple, cost-effective alternative to replacing them. Contact your cabinet manufacturer and order new door and drawer fronts. This will make your kitchen storage look new and impress potential buyers.

After you’ve switched out your cabinet fronts and done some kitchen cleaning, spotlight the space with new lighting. If you want to get ambitious, introduce some more fixtures. Of course, you could go the cheaper route by replacing your current bulbs with brighter models. Interior designers normally advise homeowners to provide 100-watts per 50-square-foot section.

Thanks for watching! Stop by later for the fourth and final installment of Staging Strategies.

Staging strategies: Bedrooms and bathrooms [Video]

Hi! Welcome to the fourth and final installment of Staging Strategies. Today, we’re going to close out this video series with some staging guidelines for bedrooms and bathrooms.

Many real estate agents find that homebuyers are most attracted to contemporary furniture featuring clean lines and simple color schemes. With this in mind, reevaluate the pieces in your bedroom and replace overly ornate or traditional furnishings with more modern alternatives. Additionally, be sure to thoroughly clean your bedroom closets. For most buyers, bad bedroom storage is a deal-breaker.

When it comes to bathrooms, cleaning is the key. Scrub and scour every surface. Once you’ve performed your deep clean, check for more serious issues. Often, sellers call in professionals to paint and polish well-worn tile. To finish off your bathroom transformation, hang some fresh towels.

Thanks for watching the final installment of Staging Strategies! Check back later for more videos.

Keep cool and save cash with these summer energy-saving tips

Many homeowners experience higher utility costs during the summer, as they switch their cooling systems into overdrive to fight off 90-degree temperatures and high humidity. Unfortunately, most fail to realize that this annual price hike is preventable.

If you regularly pay more for your utilities during warmer months, consider making a few energy-saving home improvements. With some simple tweaks, you can improve your home's energy efficiency and dramatically lower your summertime utility costs. To get started, follow these guidelines:

Seal windows and doors
Often, cool air sneaks out of improperly sealed windows and doors, the National Resources Defense Council reported. Luckily, fixing this problem is easy. Start with the windows. First, visit your local home improvement store and purchase some caulk and a caulk gun. Make sure to select a more viscous blend, as watery caulk is hard to apply and, in most cases, effective for only short periods of time. Before you start applying the liquid sealant to your window frames, practice on some scrap wood or paper – even individuals with the steadiest of hands have trouble applying clean beads of caulk.

Sealing up doors is a bit easier and certainly requires less manual labor. Weatherstripping is the best solution for movable features, the Department of Energy found. Prior to application, clean the dust and other debris from the edges of your doors – weatherstripping, which uses gel adhesive, only works if applied to clean surfaces. When it comes to selecting the appropriate solution, you want to look for weatherstripping that can withstand constant friction and regular temperature changes. Additionally, there are a variety of materials to choose from, including felt, foam and vinyl.

If you aren't comfortable permanently affixing weatherstripping to your thresholds, you can always go with magnetic door sweeps.

Programmable thermostats improve home energy efficiency.Programmable thermostats improve home energy efficiency.

Stock up on energy-efficient accessories
Most homeowners believe air conditioning is the key to staying comfortable during hot, humid summers. This simply isn't true. Facilitating air circulation is actually more important than maintaining low indoor temperatures. As a result, experts advise homeowners to install ceiling fans in key common areas and bedrooms. These low-cost, wind-generating accessories can sometimes take the place of central cooling systems. Plus, they use 90 percent less energy than most air conditioning units. And, on top of all that, installing them is a breeze.

Once you've installed your ceiling fan, make sure to put it on the counterclockwise setting. This allows the fan to pull cool air from the floor and move it around the room.

Of course, if you absolutely must use your air conditioner, install a programmable thermostat to make it more energy efficient, U.S. News and World Report suggested. With these devices, you can configure automated shut off times to correspond with periods when you or your family are out of the house. Most programmable thermostats will save you almost $200 per year.

Mind lighting fixtures and appliances
Indoor lighting fixtures equipped with traditional light bulbs give off an immense amount of heat. In the summertime, when temperatures are already cracking the 90-degree mark, this extra energy release can make already uncomfortable indoor conditions unbearable. To prevent this situation from occurring, switch off interior lights at dawn. If you want to take it a step further, try replacing stock bulbs with energy-efficient alternatives like light-emitting diodes or compact fluorescent lamps. These use 25 to 80 percent less energy than traditional incandescent bulbs and last up to 25 times longer. Plus, they give off less heat.

"Try replacing stock bulbs with energy-efficient alternatives."

Exercise similar restraint when working with heat-emitting kitchen appliance such as ovens. When dinner time rolls around, try grilling outside – you can help save the world and keep your home cool.

Contact your utility company
If you're serious about improving your home's energy efficiency and want to make large-scale improvements, contact your local utility for help. Most offer rebates or incentives to homeowners with such objectives in mind and offer reimbursement for a wide range of services, including energy auditing and insulation installation. For instance, Maryland partnered with local utilities in 2008 to start the EmPOWER Maryland program, which provides financial incentives to local home and business owners interested in implementing energy-efficient property improvements.

Stay cool and save money this summer by adopting these energy-efficient strategies.

Staging strategies: Common areas [Video]

Welcome to the second part in our staging strategies video series! Today, we’re going to discuss staging tips for key common areas.

Upon entering homes, prospective buyers often encounter the foyer or living room – spaces that see the most traffic. To start the selling process off right, clean these areas and remove any clutter, including personal items. This simple, cost-free adjustment will make your home feel larger and enable buyers to envision themselves inhabiting these rooms.

Next, focus on your furniture. Most real estate experts advise sellers to move their pieces into the center of the room and create groupings. By making this change, you’ll save space, improve traffic flow and lend your living room a homey, conversational feel.

Thanks for watching this installment of staging strategies! Come back later for more.

How to maintain a healthy summer lawn

In the summertime, lawn care takes precedence over other household chores. In fact, during these warmer months, Americans devote almost 20 minutes per day to tending their lawns, the Bureau of Labor Statistics found. Many spend these moments implementing meticulous grass-growing strategies designed to yield the straightest, most verdant blades imaginable.

Unfortunately, nature rarely cooperates and crushes the dreams of even the most studied lawn cultivators. If you're one of these often defeated growers, consider switching up your strategy. To get started, review some of these essential summer lawn care tips:

Fertilize and seed with care
The luscious green lawns on those magazine covers you gawk at while checking out at the home improvement store are products of carefully crafted fertilization and seeding schemes. Luckily, with a little research and work, these strategies are easy to replicate.

First, you should find a fertilizer blend that melds with your grass type, Today Home suggested. Once you've picked your preferred feed, purchase a spreader and get to work. Lawn care experts advise homeowners to fertilize only once or twice per year. This schedule will save you from addressing the over-growth that comes along with constant feeding and enable you to hold onto cash you'd normally spend filling up the mower or buying more fertilizer. Plus, longer grass blades grow deeper roots and block evaporation, preventing water from leaving the soil. You'll end up using less water – a savings that will most certainly improve your home's energy efficiency.

Some homeowners replace their lawns with landscaping features or paved walkways.Some homeowners replace their lawns with landscaping features or paved walkways.

Perform mower maintenance
Many lawn aficionados put a lot of thought into how they feed their lawns but rarely consider the tools they use to trim them. This careless methodology doesn't normally result in luscious grass, as mower maintenance directly correlates to overall lawn health. 

Before you slice a single blade, make sure your mower is ready to roll. Drain the gas tank and oil pan to remove any overly viscous fluid capable of causing engine damage. After replacing these fluids, swap out the spark plug and clean the air filter.

Next, move onto the actual cutting components. Obviously, be very careful when handling your mower blade – even dull ones can send you to the hospital if you're not careful. Remove the blade and send it off for sharpening, Scotts advised. Blunted blades shred grass and produce mangled blade tops that quickly turn brown. Additionally, adjust your mower height. After trimming, grass should be between 2 and 3.74 inches tall, Michigan State University reported.

Water wisely
Most lawns require 1 to 1.5 inches of water each week, Consumer Reports found. Of course, that doesn't mean you need to turn your sprinklers on full blast for hours at a time. Instead, keep track of the weather and hold off on days you expect rainfall. Again, this will save you an immense amount of water and reduce your utility bills.

"Morning watering sessions give lawns time to dry before nightfall."

When you do need to water, set out your equipment between 5 and 10 a.m. During this window, the sun is at its lowers point, meaning your precious tap water won't be instantly evaporated. Plus, early morning watering sessions give lawns ample time to dry before nightfall when harmful, moisture-hungry funguses appear.

Consider alternatives
If you're tired of maintaining your problematic lawn, you might consider reducing its size. Many homeowners replace large swaths of grass-covered ground with gardens, patios or trees, all of which require less work. For instance, flower beds are better at holding in moisture and can survive with only periodic maintenance. Plus, landscaped areas also improve home energy efficiency, the Department of Energy discovered. Some studies show that they reduce air conditioning costs by as much as 75 percent.

With these tips in mind, carefully consider your options and decide the best strategy for defying mother nature.

Staging strategies: Outdoor areas [Video]

In this video series, we will explore home staging strategies for key locations prospective buyers often scrutinize during walkthroughs. First up: outdoor areas!

Curb appeal is a major concern for most buyers. So, make some small, yet eye-catching adjustments to your home’s facade. First, trim your existing trees and shrubs so they don’t block windows or key architectural features. Next, add some pops of color to highlight points of interest and give your home some additional character.

Once you’ve tackled the front yard, move around to the back. If you have a patio area, call in a power-washing service to get rid of any longstanding grime. Then, address your outdoor furniture situation. Working with drab but salvageable pieces? Role on a new coat of paint to freshen things up. Dealing with irredeemable furniture? Nab a new outdoor dining set.

Thanks for watching! Check back later for more home staging strategies. 

Tips for painting like a pro

If you're looking to test the housing market, you should probably make simple home improvements before staking down the for-sale sign. Of course, it can be difficult to choose which areas to address. Fortunately, there's one cost-effective interior upgrade sure to score you major points with prospective property purchasers: new paint.

Most do-it-yourself painting projects cost around $100 to complete and net 1 to 2 percent returns, according to Consumer Reports. But before you ready your roller, review some professional-grade interior painting tips.

Properly prep surfaces
Successful painting projects often begin with preparation, Popular Mechanics found. Take stock of your walls and look for damaged areas that might require patching. Though time consuming, this step is essential, as most interior paint blends – even the expensive kinds – aren't engineered to hide serious imperfections.

Most professional painters use putty or spackle to fill in pock marks, This Old House reported. For more serious dents deeper than one-eighth of an inch, switch to plaster. Once you've filled all the holes, perform some intensive sanding to get rid of chipping and create a fresh surface for your new hue.

Finish off the prepping process by rolling on a couple coats of primer. This stuff is essential, as it prevents drywall staining and helps paint adhere to walls. However, don't apply primer straight out of the can. Tint the mixture by stirring in some of your primary paint.

Good equipment often yields favorable results.Good equipment often yields favorable results, so choose your roller wisely.

Pick the right paint
When shopping for paint, most homeowners focus on pinpointing the perfect color and spend little time talking texture. Experts uniformly agree that this superficial approach to picking paint often yields shoddy results. So, as you peruse the interior hues available at your local home improvement store, carefully consider your finishing options. Most manufacturers produce paints in two main finishes: gloss and matte.

Glossy paints are more stain resistant than matte blends but often emphasize imperfections. Conversely, matte paints are better at hiding vertical bumps and bruises but look drab when applied to walls. As a result, most professionals work with glossy paint.

"Flat paints are fine for ceilings and formal rooms, but for most of my customers, I recommend an eggshell gloss," Carmen Toto, owner of the Madison, New Jersey-based painting company C. Toto and Sons, told This Old House. "It's good for hallways, kids' rooms, even kitchens and baths."

No matter which finish you choose, make sure to purchase quality paint. Most cost between $20 and $35 per gallon. You might also consider buying some paint additives as well. These substances slow paint drying times and make it easier to manipulate once its on the wall.

Gather the necessary equipment
After you've picked your hue and finish, nab some essential painting accessories. First, you'll need a drop cloth to protect your flooring against unexpected spills. Canvas cloths are more effective than plastic alternatives, as they don't tear and easily absorb paint, Popular Mechanics found. 

"Canvas drop cloths are more effective than plastic alternatives."

Next, choose your painting tools. Professionals normally use a combination of rollers and brushes. Most work with rollers equipped with half-inch naps made of lamb's wool. These hold a good amount of paint and don't create too much texture. 

When shopping for brushes, turn your attention to bristle type. Brushes with stiff, polyurethane bristles are good for detailed work while those with nylon bristles more effectively spread paint across large surfaces. Quality, professional-grade brushes cost anywhere from $15 to $25. However, the spend is usually worth it at the end of the day.

"Pros aren't as talented as you thought," Richmond, Virginia-based painter Brian Doherty told This Old House. "The equipment has a lot to do with their success."

With these guidelines in mind, go forth and get to painting. Prospective buyers will appreciate your efforts.